It’s Been So Long….

Wow, I really haven’t posted in a while! I’m afraid life has really gotten in the way over the past 6 months or so, with some family illness, a crazy school schedule and some computer issues (still not sure about putting photos in this post because of this). The ironic thing is that I have actually been cooking and creating more than ever! I have been really inspired (like many of us) by the cookbook Jerusalem and lately by their older book, Plenty. I have many cookbooks but I have to admit that I don’t use them very often, I occasionally look at the pictures but mostly come up with my own stuff. What I love about Plenty is that not only do the recipes look amazing but I usually have most of the ingredients already. I have tried several recipes (or recipes closely inspired by the book) and they are all winners! Plenty really lends itself to tweaking and experimentation and I have been loving the bold flavours and all the different grains and spices!

Although last summer was stressful, we still managed to have some good times. I made some animal pals at the Pacific National Exhibition that I thought I would share with you!

Llama Pal!

Llama Pal!


"I love Moo!"

“I love Moo!”


Friend not Food!

Friend not Food!

I have been making a lot of different types of food lately and recently discovered a way to make homemade seitan! This was very exciting but the recipe needs a bit of tweaking before I post about it. It will come though! Seitan is a meat substitute made out of a high gluten flour (the definition of not being gluten free, unfortunately) and I have always wondered about it but thought it would be a big pain to make. It’s actually really easy and you can use it in many ways. If you purchase a lot of fake meat stuff, it can be an interesting and cheap alternative to the super processed fake hot dogs and deli slice stuff. I am excited to keep experimenting with it. I have been pretty stressed with recent life events so cooking has been a great way to de-stress and relax, I may not be able to control stuff outside the kitchen but in it I am fully in charge! I also found myself with graham crackers, cool whip and blueberries and channeled the 1950’s to do a refrigerator dessert. It didn’t look pretty but I have to admit it tasted great! I may post it if I can get the photos to look a little better.

The middle eastern flavours in Plenty and Jerusalem are still intriguing me and I’ve been thinking about one of my favourite foods, Falafel! I love falafel but the deep frying can make it kind of unhealthy. I decided to try my hand at a falafel inspired burger instead so I hope it works out! You can make these into little patties for a wrap or big ones for burgers.

Falafel Inspired Burgers (Vegan)

Yield: 12 little patties or 4 big ones

Ingredients

1 can chickpeas (540 ml), rinsed and drained

1 C. cooked brown rice

1/2 bunch cilantro

1/3 onion

3 garlic cloves

1 t garlic powder

1 t onion powder

1 t za’atar

1 t cumin

1/2 t chili flakes

2 T chopped parsley (more if you like a stronger parsley flavour)

salt and pepper

1-2 T hot sauce (optional)

-combine all ingredients in food processor and pulse until well combined

-place into bowl and form into patties of desired size with your hands (get right in there!)

-saute on each side until browned and heated through or (although this takes out the healthy aspect) you could shallow fry the little patties

-don’t over process or it will be mushy

-place in pita or bun with plain yogurt, lettuce, cherry tomatoes and pickled peppers and enjoy!


Wedding Vows, Exotic Spices and Slow Cookers

Posted on

Wow, what a crazy month! April was a complete whirlwind with the end of school, finals and our crazy two month planned wedding! Everything worked out amazing and the ceremony and the dinner after were wonderful. I got to hang out with the fam and my new in-laws who are also amazing. Now things are getting back to normal post-honeymoon and I’m still on vacation! No school until next week! Woo! Well, school has started but I haven’t found the time to blog until now. So,here I go!

Flowers at Granville Island

Flowers at Granville Island


I have some food related plans for the summer including perfecting pizza dough (wedding gift pizza stone!), making doughnuts, fondue experiments (wedding gift fondue set!) and getting into my cookbooks! I just reorganized all the books in the house which took all day with bookshelves in three rooms and they are in some semblance of order now; fiction, mystery, science fiction and crime fiction alphabetized. I still have to work on the non-fiction though, at hour five of the organizationathon they just got shoved in.

But as far as the cookbooks are concerned, the top of my list is my bread one (Bernard Clayton’s New Complete Book of Breads) and like every other food blogger on the planet, Jerusalem! I have already made a few items but have barely cracked this beautiful ode to Middle Eastern cooking! I have been interested in that region’s cooking for a long time so I am loving the book so far.

Sunset on Harrison Lake during the honeymoon

Sunset on Harrison Lake during the honeymoon

My new obsession is za’atar, the spice mix used throughout the book. I got it for a specific recipe and have been putting it on everything! After searching for it at a few grocery stores, I found it a great middle eastern store on Main st called Yek O Yek (to the Vancouverites out there, if you haven’t been there, go now!). I should have just gone there in the first place. They had several sizes of containers of the spice which is mix of several dried herbs including varieties of thyme, oregano and sumac. I got a big container for five bucks and I’m so glad I went for the big size because it’s almost gone! It is great on rice, tossed on salad, mixed with breadcrumbs and crusted on tofu, stirfries and my most recent indulgence on hot buttered popcorn! It would also be yum mixed with plain yogurt for a dip or in a hearty stew or soup! I love it! So when, I started this post a few weeks ago, I was going to post a za’atar inspired recipe but unfortunately I’ve used up almost all of it so that recipe will have to wait.

The view from our room!

The view from the beach!


But I do have a couple of other ideas up my sleeve. The other day me and the man were window shopping and I saw a very cheap cookbook, Now, I have a fair amount of cookbooks but I don’t buy them very often (before Jerusalem it had been a long while). I prefer to get them out of the library and use them more for inspiration than for actual recipes. But when I saw this book, I knew I would be able to get some real use out of it. It’s called “Fresh from the Vegan Slow Cooker” by Robin Robertson and it has a million (well, 200) ideas!

My husband bought a slow cooker a couple of years ago and I can think of tons of meat based recipes to make in it, but when I though about veggie stuff, I was like, chili….Then I was out of ideas! This cookbook has essentially blown my mind with recipes for things I never would have associated with slow cookers. How about cake? Dips? Bread? There’s recipes for all this stuff and it’s all vegan! I dove in and have a couple recipes inspired by some in the book.

They’re not all winners and some have a bit of a 70’s vibe but hey, I like the 70’s, I like the nightlife, I like to boogie, on the disco rooooound! Anyway, I used some recipes from the book as the inspiration for these but tweaked them a bit. Now, bear in mind, your slow cooker may be a bit different than mine so you might need to keep an eye on things (for the cake anyway).

Vegan (fat-free) Apple Spice Cake (adapted from “Fresh from the Vegan Slow Cooker”)

Apple Spice Cake (sorry about the lighting)

Apple Spice Cake (sorry about the lighting)

1 3.4 c. all purpose flour

1 t baking powder

1 t baking soda

1 t ground cinnamon

1/4 t ground ginger

1/4 t ground cardamon

1/4 t ground nutmeg

1/4 t ground allspice

3/4 c. brown sugar

1/3 c. soy milk

3/4 c. applesauce (I used unsweetened but it’s up to you)

1 t vanilla

2 apples, peeled and diced

2 T marmalade (I used ginger but again any type will work)

confectioner’s sugar for sprinkling

-Line your slow cooker with a double layer of parchment paper

-combine the dry ingredients in a medium bowl, and the wet (except the diced apples) in another

-mix together (the batter will be pretty thick)

-press into cooker, spreading evenly and top with diced apples. Place a tea towel over the cooker (with the lid on) and cook on high for two hours, check for doneness after an hour and a half. Lift out the cake when down and sprinkle with sugar! It’s nice and spicy (with flavour not heat) and would be good with coffee or for breakfast or just for snacking!

This is going to be a two recipe post! Making up for lost time. So, I am an oatmeal lover and love steel cut oats. The only thing is,they take about half an hour so sometime I don’t have time in the morning. Enter the slow cooker, you just have to get it together the night before and you will wak up to a hot breakfast and a delicious smelling kitchen. So, this was also inspired by the slow cooker cookbook and by finding a can of cranberry sauce left over from Christmas! You may be in the same boat so use up your leftover canned fruit, I think any type would work, maybe peaches or pears too!

Apple-Cranberry Slow Cooked Steel Cut Oats

1 3/4 c. steel cut oats

1 can cranberry sauce

5 c. water

2 peeled, diced apples

1 t cinnamon

1/2 t ground cardamon

1 t vanilla

1/3 c, brown sugar

-spray the inside of the cooker (this was a sticky one because I didn’t spray mine!)

-combine everything in the cooker, give a little stir and set it for low for eight hours. That’s it! So easy.

It’s not super sweet so you can add more sugar when it’s done if you want. Hopefully these recipes will get you dragging out those slow cookers from the cupboard and looking at them in a different light. So, more on za’atar next time!

Spring Will Soon Be Sprung

Posted on
Snow Formations on the Hike

Snow Formations on the Hike

As a super rainy day winds down I am feeling pretty good! I got a bunch of school stuff done today and got a new umbrella. Pretty productive day. I can feel the weather changing though, day light savings is the first step! We also were able to get out for our first hike of the year, at least until the snow forced us to turn back. I’m looking forward to finishing that hike in a month or two when the white stuff has completely melted. The mountain air felt so good, my brain was slightly loose for the rest of the day! In a good way.

Deep in the Woods!

Deep in the Woods!

I’ve been thinking about making a hearty version of miso soup for awhile now and today seemed as good a day as any. It also borrows a bit from the Japanese dish Agedashi Tofu which I am a huge fan of. If you haven’t tried it/heard of it, check it out here. It’s delicious addition to a night out with  veggie sushi! I am a big fan of Japanese food and flavours. I especially love their food presentation.

I’ve had a half pack of soba (buckwheat) noodles in the cupboard for awhile now and I’ve been meaning to use them up. I had miso paste and tofu in the fridge so I decided to start cooking! Here’s the result:

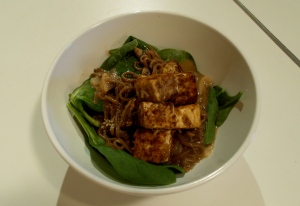
Hearty Miso Mushroom Soup with Soba Noodles and 5 Spice Tofu

The Soup

The Soup

Yield: 4 big servings or six smaller

Ingredients

For the Soup

4 garlic cloves minced

10 button mushrooms, diced

1 med. onion diced

4-6 handfuls fresh spinach leaves

1 t sesame oil

5 c. water

100 g soba noodle (dried)

hot sauce (optional, to taste)

1/4 c. miso paste

1 t soy sauce

For the tofu

1 lb firm tofu cut into 25-30 cubes

1/4 fine bread crumbs

1 t  ground cumin

1 t chili flakes

1 t 5 spice powder

salt and papper to taste

1/3 c. canola oil

-saute the mushrooms, onion and garlic for 5-10 minutes in the sesame oil

-add water, miso paste and soy (hot sauce)

-bring to a boil and add noodles , cook 6-7 minutes (you could cook the noodles first as they do get a bit gluey, the soup will reduce quickly if you let it boil too long)

-meanwhile heat the canola in heavy bottomed wide pan

-combine the spices and bread crumbs and toss with the tofu until they are coated

-shallow fry the tofu 6-8 cubes at a time (you can keep them hot in a low oven on a tray if needed)

=get out 4-6 bowls and place a handful of spinach in each, add 2-3 ladles of soup over the spinach and top with 5-6 crispy tofu cubes!

-top with sesame seeds if desired

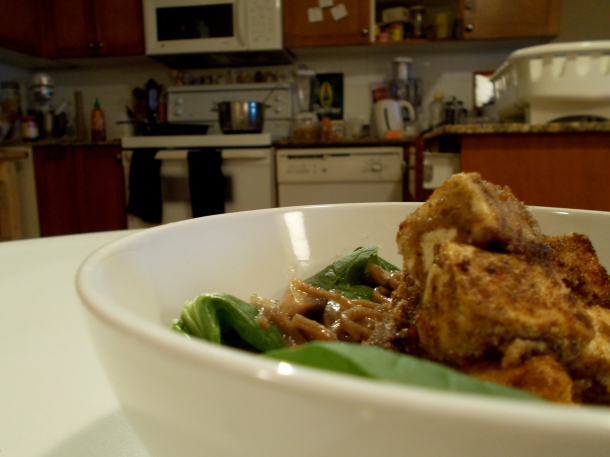
Close Up with the Kitchen  in the Background! Here's Where the Magic Happens! Well, Sometimes.

Close Up with the Kitchen in the Background! Here’s Where the Magic Happens! Well, Sometimes.

This soup is very quick so you get the fun of a homemade soup with out being glued to the stove for 2-3 hours. Soba noodles are not only tasty, they are also good for you and are full of amino acids, antioxidants and some protein too, of course the tofu int his recipe also contains protein! You could also add the spinach directly to the soup 2-3 minutes before serving. This recipe is vegan also! Enjoy.

Rain Rain Every Day!

Posted on

It’s definitely almost Spring in Raincouver. It’s been raining pretty much nonstop for the last three or four days but at least February is over. I spotted cherry blossoms near my house and there are crocuses and snow drops dotting local lawns. I won’t really know change is coming until I see a robin; that  is the true sign of Spring for me.

Soon...

Soon…

I used to be the kitchen manager at a popular bar/hostel downtown and there was a little cafe attached as well. I used to do a sort of tortilla pie there as a lunch special sometimes and I suddenly remembered it a couple of weeks ago. I don’t remember quite how I used to  do it so this recipe is a variation there of. It’s an easy recipe but some assembly is required. Don’t be intimidated by the steps, once the fillings are prepared it is quite simple.

Me and the man have been on a real hot sauce/spice kick lately so this is one spicy meatball (say with bad Italian accent)(except it’s not a meatball or Italian). But I digress. Feel free to eliminate or use only a quarter or half of the habenaro in the filling to tone down the heat a little. We can’t get enough of different hot sauces lately and are starting quite a collection. If anyone has good hot sauce suggestions please let me know in the comments!

This recipe will become vegan very easily as there is only a little bit of cheese and that could be switched for non dairy or left out all together.

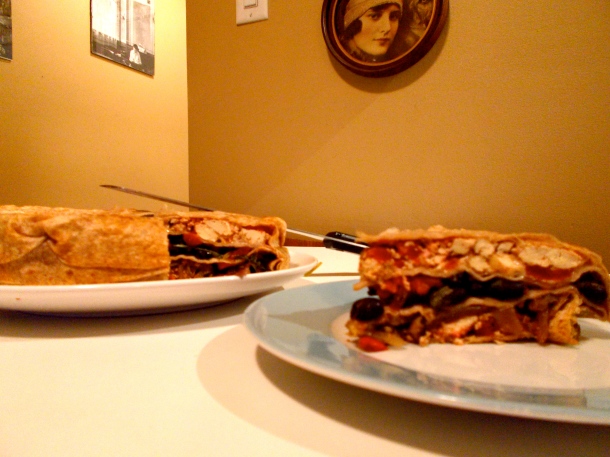
Spicy Tex-Mex Tortilla Pie

The Results

The Results

Yield 8 Servings

Equipment: 8″ or 9″ spring form pan, parchment paper

Ingredients

3 clove garlic minced

1 red pepper julienned

1 med onion julienned

1 habenaro*  minced (can be optional or use less than a whole habenaro)

1 lb firm tofu crumbled

2 t cumin

1/2 t tandoori masala spice

1 t chile powder

1/4 t chili flakes

1/2 can black beans (19 oz can)

3/4 can diced tomato (24 oz can)

1/2 bunch cilantro

4 oz shredded mozzarella (optional or substitute non-dairy shredded cheese)

4 large flour tortillas


Preheat oven to 375

*do not touch your face or skin after handling habenaros, wash hands after handling!!!

-saute the onion, pepper, garlic, habenaro and 1 t cumin. Make sure you put the fan on when sauteing with the habenaro! Don’t forget like I did and spend the next forty minutes choking and coughing on the the hot pepper fumes!

-set aside sauteed veg

-combine tofu with remaining spices, 1/4 can of the tomatoes and a bit of salt and pepper in a bowl, set aside

-combine  1/2 can tomato, beans and cilantro with a bit of salt and pepper (you can make the leftover canned stuff  and cilantro into a salsa by giving it a little buzz in a processor and adding some lime juice and hot sauce!) set aside

-spray the springform with cooking spray and line with parchment

-press a tortilla into the bottom of the pan, it should be big enough to come up the sides of the pan a little

-place 3/4 of the tofu mixture and the cheese on the tortilla

-top with another tortilla, get your hands in there and press it down and tuck it in a little

-add the bean, tomato and cilantro mix

-add another tortilla, press and tuck

-top with the sauteed veg and remaining tofu

-finish with the last tortilla and cover with foil

-bake for 45 minutes

-rest for 10 minutes and invert onto a plate, gently release the springform

-cut into pieces with a serrated knife. Top with sour cream or greek style yogurt and salsa if you like. Add a salad and there’s dinner!

All you need is a pinata, margaritas and cha cha music and it’s easy to pretend it’s not raining and miserable outside! Ole!


The Cruellest Month

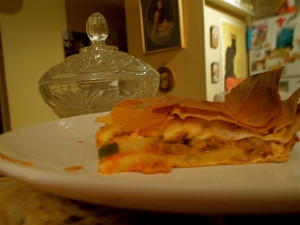
I am not sure if January or now February is the cruellest month but it feels like it here in Vancity. Actually the weather hasn’t been that bad but it’s raining right now so I can complain. If you’re like me you might have a few items in your fridge and/or cupboards left over from special holiday dishes. I’ve been staring at the half package of phyllo in the freezer for a few weeks now and decided to do something about it yesterday. I like working with phyllo and it’s not that bad for you as long as you don’t go too crazy with the butter or olive oil. I decided to a kind of phyllo pie thing and it turned out pretty well.

Phyllo Pie with Zucchini and Feta

Preheat oven to 400

Yield 8-10 portions (depends how you slice it)

2 T minced garlic

1 large zucchini (about 1 lb) sliced thinly lengthwise

1/4 c. melted butter or olive oil

2 c. tomato sauce (whatever type you prefer)

8-10 sheets phyllo

1 package of veggie ground beef (I like Yves brand)

3 oz crumbled or sliced feta

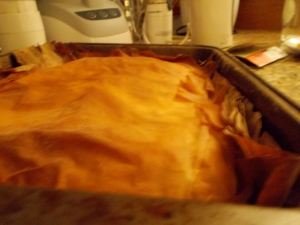
it kind of looks like a paper bag but it tastes good!

it kind of looks like a paper bag but it tastes good!

-spray a deep baking dish with cooking spray

-layer 2 sheets of phyllo and brush with a little of the butter or oil

-repeat

-place the zucchini slices  over the phyllo

-season with salt and pepper, you could add some oregano too if you like or basil

-spoon the tomato sauce over top and sprinkle the garlic over

-add the “beef”

-finally add the feta

-top with 2 more sheets of phyllo brushed with oil or butter and do it twice

-don’t worry if the phyllo rips or crumbles just stick it on

-place in the oven for 35 minutes

It gets a nice golden brown on top and slices up easily, you could also double this recipe and do another layer of everything to make a phyllo lasagne. This is nice and light with just a bit of cheese, the strong flavour of the feta lets you get away with only using a little bit. You could also add more veggies like spinach or peppers and change the cheese or leave it out if you want. You could add a quick salad and boom, dinner!

A little slice.

A little slice.

I just got my copy of Jerusalem, the cookbook that’s everywhere these days (finally, it’s been sold out everywhere since Christmas) and am super excited about it. It will definitely be inspiring some future posts. I am making something from it tonight and am just trying to work up the courage to venture out in the rain. I can feel Spring just around the corner though and am just generally a happy camper today!  Hence all the exclamation points!!!

Happy Belated New Year!

Well, Christmas kicked my butt and now I’m back to school and it’s getting crazy again! So, I’m going to get right to the recipe. I made this pie at my harvest dinner with gravy and without the gravy at Christmas. (I used the powdered stuff, oh the shame!)

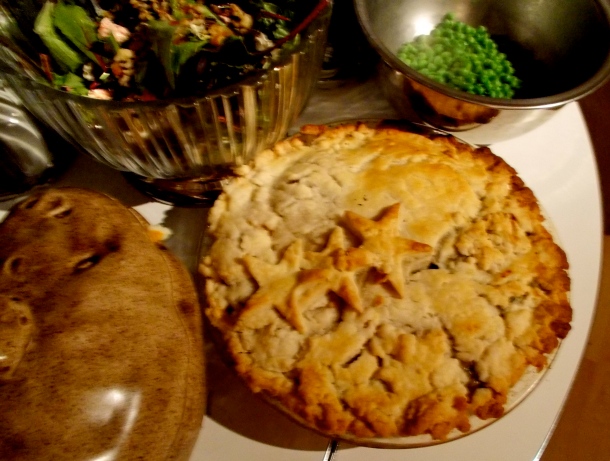
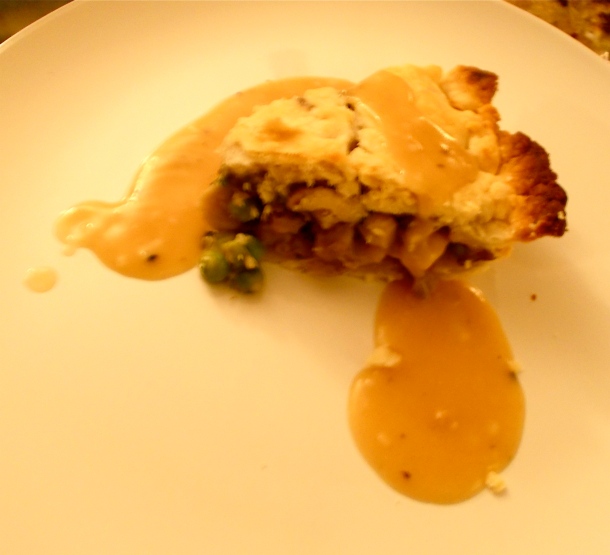
Mushroom Pie with Roasted Vegetable Gravy

The Christmas Spread

The Christmas Spread

The Gravy (can be made ahead or in tandem with the pie)

3 mushrooms, halved

1 onion, rough chopped

2 carrots, cut into big pieces

2 celery ribs, chopped large

1/2 bunch parsley

2 bay leaves

1/4 c. red wine (optional)

1/2 c. flour

1/2 c. butter or vegan margarine

oil

salt and pepper

-preheat oven to 375

-toss veggies with oil and roast until tender and beginning to caramelize about 25-30 minutes

-scrape veggies and caramelized bits into a medium sauce pan (this would be the time to deglaze the roasting pan with a little wine if you like)

-cover with water and add the parsley and bay leaves

-simmer 2-3 hours (you can make the pie during this time)

-strain the stock into something that’s easy to pour out of (I used a big measuring cup)

-use the flour and butter to make a roux (a roux is a traditional sauce thickener, melt the butter and whisk the flour in over low heat, stir fairly constantly to avoid burning until the roux is caramel colour)

-pour the stock into the roux slowly, whisking while you do so until the stock is gone and/or you achieve the thickness you are looking for in a gravy

-add salt and pepper to taste

DSCN0877

The Pie

1 ib assorted mushrooms (I used button, oyster, portabello and shittake but you can use whatever you like) sliced

2 potatoes, peeled, large diced and parboiled

1 small onion, diced

1-2 T minced garlic

1 c frozen peas

1 t sage

1 t  fresh thyme, chopped

1 t parley, chopped

salt and pepper

hot sauce (optional)

1 pie crust (top and bottom)

-prepare pie crust (i used the recipe on the veggie shortening package and it turned out awesome, but use whatever recipe you like for a nice flaky crust or buy ready made dough, whatevs!)

-saute the garlic, onion and herbs

-add the mushrooms and saute

-add the potatoes and peas and season to taste with salt and pepper

-if you have already made the gravy you can add a little to the mushroom mixture

-place the unbaked crust in a pie pan fill with the filling, heaping it up a bit if you need to. Cover with the top crust and decorate with the extra dough if there is any

-bake at 400 for 45 min or until the crust is golden brown

-slice and top with the roasted veg gravy

Enjoy! Hopefully, I will be posting more often soon! Maybe Valentine’s Day?

Harvest Dinner Part 1

Well, I can’t believe November is almost over! So is the semester! Woo hoo! It has gone by really fast which sounds like a cliche but is true. Since we were in Vegas (lucky us) for Thanksgiving this year, I was determined to  have a big dinner when we were back. It finally happened a week or so ago and this post will also happily coincide with our American friends ‘  Thanksgiving. We had a couple of couples over including one tiny guest who was only interested in mashed sweet potato for some reason (probably because she only has 2 teeth). I did three courses and I’m going to share the details of the salad course today!

I wanted to do something fairly hearty but not too filling. I recently went to a great new vegetarian restaurant in town called The Acorn and had a delicious main that really inspired this dinner; it had spelt and mushrooms  and a beautifully savoury peppercorn sauce. I  loved the chewy and flavourful spelt and was determined to make some soon. I was a bit worried that the spelt would be labour intensive and would require like overnight  soaking and rinsing and have a four hour cooking time but when I looked it up I was pleasantly surprised. It’s easier to make than rice! I wanted some fall elements and some classic Thanksgiving flavours so cranberry was a must; arugula is one of my favourites so that was a must too. I hope you like the result!

Next week I’ll post about the main which was a Mushroom Pie with Roasted Vegetable Gravy

Spelt and Arugula Salad with Cranberry Apricot Dressing (serves 4-6)

the salad

1 C spelt (cook according to instructions here)

2/3 C. walnut pieces

2/3 C. dried cranberries

6 oz arugula (about half of one of those plastic containers of already washed leaves)

-once spelt has cooled combine with walnuts and cranberries

-place arugula in a separate bowl

the dressing

1/2 can cranberry concentrate, thawed

1/3 c. apricot jelly (I had apricot on hand but raspberry or strawberry would work too)

1 T balsamic vinegar

1 T sugar

1/2 c. olive oil (you can use a little more or less)

-place ingredients except oil in blender and turn on low

-pop that little thing out of the lid and add olive oil in a slow stream (I take no responsibility for blender spray mishaps!)

-once emulsified, check that the flavour is to your liking and add a little salt and pepper

-toss the spelt mixture with about half the dressing and let marinate for an hour or so

-toss the arugula with the other half right before serving

-place 2/3 C  spelt on the plate and top with some arugula- pile it up high for the best presentation

-enjoy!

The Finished Product


Triumph of the Bun

Hallowe’en Mask

I am very excited right now! The dream of many years has come true. I have made steamed buns! Hurrah! Chinese cooking is something that has always fascinated me and there’s nothing I like better than heading down to T & T (a large chinese supermarket) or any little Chinese grocery or vegetable market and just browsing and trying new things. Somethings are successful (rich sheet rolls) and some are not (weird yam noodles that taste like solid water). When I was cooking professionally I wanted to work at a Chinese place, preferably a Buddhist one but there was always a language barrier that prevented me from doing so. I’ve wanted to learn about Chinese baking and dim sum but wasn’t sure how as the cooking classes I have been able to locate were taught in Cantonese. There’s always cookbooks but I was a bit intimidated to take on yeasted items  without actually seeing someone do it. (I guess I could look on the internet! Oh well) The point is, I made steamed buns.

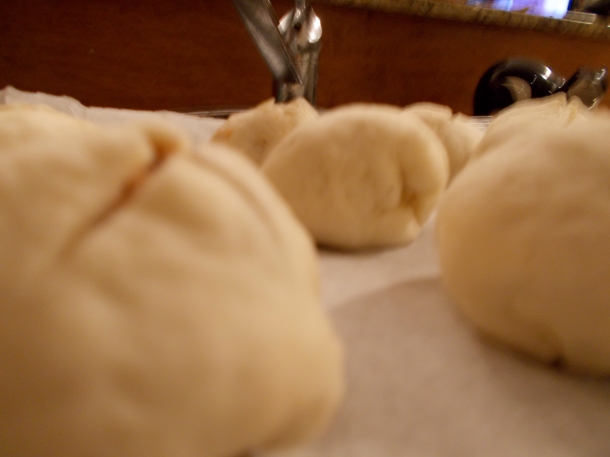
Pre-Steamed Buns

What I really wanted twas to have a BBQ bun that was vegetarian. Store bought veggie steamed buns are great but the fillings can be a bit bland and even though I haven’t eaten them in years I remember the great flavour of the BBQ pork buns. So I used the steamed bun recipe from Saveur but did my own filling with the aim of recreating BBQ pork without the meat. I think I succeeded and I hope everyone agrees!

It’s Hallowe’en today so I figured I’d put up a photo of my pumpkin! Have a spooky day!

Haunted Graveyard Pumpkin


BBQ “Pork” Steamed Buns or Char Siu Bao

Equipment:

stand up mixer

bamboo steam baskets with lids (you could jerry rig something with a regular steamer but it’s easier with the bamboo ones)

parchment paper

The Bun (adapted from Saveur magazine)

3 1/2 C flour

1 t baking powder

1 t instant yeast

1 T sugar

2 T veg shortening, diced

-combine yeast with 1 1/4 C water (115  degrees) until foamy about 10 minutes

-make sure the water isn’t too hot (unlike what I did the first few times! Oops, I killed the yeast.)

-combine the dry ingredients in a standup mixer with a paddle attachment

-add the yeast and combine at low speed

-add the shortening one piece at a time

-i kept the speed at low-med for about five minutes until it forms a ball

-cover the bowl with saran wrap and let rise for two hours

Green Onions

The Filling

you can do this while the dough is rising

1/2 t Chinese 5 spice powder

1.5 T molasses

3 T brown sugar

20 oz canned tomato

1 T minced garlic

1 T minced ginger

2 green onions, diced

1 lb firm or extra firm tofu

4 king oyster mushrooms, small diced

2 t minced garlic

-combine the  first seven ingredients in a medium saucepan and simmer on low heat for 45 min-1 hour

-puree in blender (be careful) add salt and pepper to taste

-saute the mushrooms and 2 t garlic for 3-4 min

-drain liquid from pan, add crumbled tofu

-saute 2-3 minutes

-add sauce and combine to throughly coat

-let the filling cool to room temp (I didn’t do this and it would have been a lot easier if I had)

Once the Dough Has Risen!

-turn out the dough and knead for 5 minutes

-divide the dough into 8 or 16 depending on how big you want your buns!

-shape into a ball and flatten a bit, place 1 1/5 T or 3-4 T depending on how big they are in the middle and pinch closed

-cut the parchment into little circles or squares and place bun seam side down on the paper, cut in a cross to let steam escape

-place in steamer, cover with lid

-put some water in a wok and get it steaming, put in steamer and cook 12-15 minutes until the buns are cooked and puffed

-enjoy!

Buns


Autumn Flavours Must Be Obeyed

orange sesame dressing

I had big plans a couple of weeks  ago to post some fruity dressings and light summery salads. Unfortunately, the new school year has interfered a bit. After tromping across campus a few times, doing my readings and attempting to go to the gym, work and have a social life, my blogging has fallen a bit low on the priority scale. But I’m ready to dive back in. I finally had two days in a row off this week and am getting a chance to do  a little pleasure reading and writing.

I knew I wanted to do a salad for my next post but was feeling a little uninspired. I headed down to Whole Foods to fire up my brain and creative juices. I left empty-handed because everything was too expensive. I also noticed that it’s Fall! Berry prices have skyrocketed (duh) because they’re out of season. I journeyed across the street to a less esthetically pleasing but better priced grocery store and suddenly my idea of light, juicy flavours became one of robust, mellow and savoury ingredients. Pears, squash, yam, dark greens and grains but a little citrus to brighten it up and maybe some sesame to lend it an earthiness. Although sesame is often associated with Asian flavours I think it syncs well with orange veggies and starchy foods too. We have had an amazing August and September here in Vancity with lovely sunny weather almost every day. With risk of setting off the rain gods, I have to  say that it hasn’t rained in almost three weeks! That being said, I was getting a little tired of wearing shorts and skirts with bare legs every day. I was able to snug out in my new soft hoodie and jeans on my shopping trip and had a nice walk to boot.

I ended up grabbing some yams, garlic, spinach, quinoa, oranges and dried pears. Hopefully you will like the results. There are a few more steps than your average salad but I think it will be worth it.

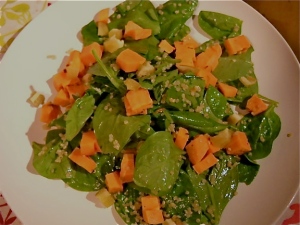
Hearty Yam, Spnach and Quinoa Salad with Sesame Orange Dressing

Yield : 4 servings

Step 1 the yams

2 yams or 1 thanksgiving size big one, peeled, cut in to med chunks

2 oranges (just 1/4 for this step)  1/4 juiced

1 T orange zest

1 T sesame oil

1 T sesame seeds

salt and pepper

-preheat oven to 375

-toss ingredients together, lay in single layer on baking sheet

-bake 35 min

-small dice when cool

-this can be done the day before if you want just bring back to almost room temp when tossing the salad

Step 2 : the dressing

1 1/2 oranges, juiced

2 T sesame oil

1 t sesame seeds, toasted

1 t sugar

1 T orange zest, minced

1-2 dashes hot sauce

-whisk ingredients together

Step 3: the salad

the salad

1 C cooked quinoa

2-3 C washed spinach, cut if leaves are large

diced yams

4 slices dried pear, fine diced

-combine with dressing, toss and serve!

Summer, It’s “Bean” Fun!

Posted on

The Ferris Wheel

Sorry about the fail on posting some salad recipes last week; work and school preparations left me a little wiped out. Speaking of school, ewww! Although I am excited to get back to it I didn’t think my four month break would go by so fast. This summer has been pretty awesome and I expect it to stay warm through September. Do you hear me weather? (shakes fist at sky).

One summer event I try not to miss is the old PNE. There’s something about the permeating smell of fried foods and spun sugar mixed with farm animals and screaming children that I just can’t do without. It didn’t disappoint this year! I got to sit in Captain Kirk’s chair!!! His real chair from the original Star Trek!!! Sorry to let my nerd out but it was amazing!!! My boyfriend was even luckier because he actually got to meet Data and Troi from TNG (Star Trek The Next Generation for the non-nerds reading this). I am seething with jealousy but am thrilled for him!  But I digress, as summer winds down I wanted to think of some way to keep it happening food wise.

Classic Fair Fare! (sorry about the pun)

Mexican inspired dishes come to mind so I thought I’d share a super easy and quick recipe for some healthy and vegan dip!

Black Bean Chipotle Dip with Pita Chips

2 pita pockets

1 can black beans (540 ml) drained (reserve liquid) and rinsed

1 1/2 T chopped cilantro

2-3 T canned chipotle in adobo sauce

1/3 lemon wedge, juiced

1/2 t ground cumin

1/2 salt (plus more to sprinkle on chips)

oil (to drizzle or spray)

-plain greek style yogurt (optional)

-put oven on broil and cut the pitas into eighths, separating the pockets so you have 16 triangular chips for each pocket (I find it easiest to use kitchen scissors)

-lay in single layer on baking sheets

-drizzle oil or use oil spray on chips  and sprinkle with salt

-place under the broiler for 2-5 minutes, you will probably have to check them every 30 seconds or so after the first two minutes. The length of time will vary depending on your oven. Keep a close watch as these chips go from done to burnt quickly!

-combine all the ingredients plus 2 T of the reserved bean liquid in a bowl and blend with a hand blender or a food processor if you have one

-top with some plain yogurt (or not if you want to stay vegan) and some more cilantro and enjoy!

Hopefully these spicy summer flavours will help the warm days stay a little longer! You could also use this in a 7 layer dip for added yum. Or have a dip party with my yam dip and my guacamole!

Afroculinaria

Exploring Culinary Traditions of Africa, African America and the African Diaspora

Vegetarian 'Ventures

A Vegetarian Food Blog with a Twist of Adventure

Best Movers Companies Toronto

A Vegetarian Ex-Chef's Attempts to Love Cooking Again!

domestic diva, M.D.

my mother raised the perfect housewife...then I went to med school

the annotated zoetrope

The Zoetrope, or "Wheel of Life," is an instructive Scientific Toy, illustrating in an attractive manner the persistence of an image on the retina of the eye; by revolving the cylinder by the hand, and looking through the openings, the images passing rapidly before the eye are blended, so as to give the figures the motions of life in the most natural manner.

bento zen

zen in lunchbox form